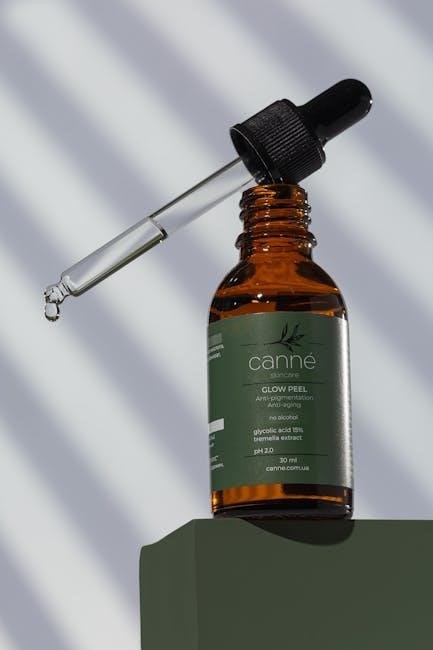
Nailboo Gel Polish offers a DIY solution for salon-quality nails at home․ It provides long-lasting, high-shine results with easy application and quick curing under UV/LED light․
1․1 What is Nailboo Gel Polish?
Nailboo Gel Polish is a specialized nail coating known for its durability and long-lasting shine․ It is applied in thin layers, each cured under UV or LED light to harden and set․ Unlike traditional polish, it provides a strong, chip-resistant finish that can last up to two weeks․ Its smooth, silky texture ensures a professional-looking result, making it a popular choice for those seeking salon-quality nails at home․ It offers a glossy, protective finish with minimal maintenance․
1․2 Benefits of Using Nailboo Gel Polish
Nailboo Gel Polish offers numerous benefits, including its long-lasting durability and high-shine finish; It is chip-resistant and lasts up to two weeks, making it ideal for low-maintenance manicures․ The smooth, silky texture ensures a professional-looking result, while its quick curing process under UV or LED light saves time․ Available in various vibrant colors, it allows for endless customization․ Its ease of use and salon-quality results make it a popular choice for achieving stunning, long-lasting nails at home without the need for professional tools․
Preparing Your Nails for Gel Polish
Preparing your nails for gel polish involves cleaning, shaping, and buffing to create a smooth surface․ Remove old polish and oils to ensure proper adhesion and a flawless finish․
2․1 Cleaning and Shaping Your Nails
Cleaning and shaping your nails is essential for a successful gel polish application․ Start by removing old polish and oils using a lint-free wipe and alcohol․ Gently push back cuticles and shape your nails with a file, moving in one direction to avoid weakening the nail․ This step ensures a smooth surface for the gel polish to adhere to, promoting a professional-looking finish and preventing peeling or uneven application․
2․2 Removing Old Polish and Oils
Start by removing old polish and oils using a lint-free wipe soaked in alcohol․ This ensures a clean, dry surface for the gel polish to adhere to․ Gently wipe each nail, making sure to remove all residue․ Oils and lotions can interfere with adhesion, so thoroughly clean the nail area․ This step is crucial for a strong bond between the nail and gel polish, ensuring a long-lasting, professional finish․ Proper preparation prevents peeling and uneven application․
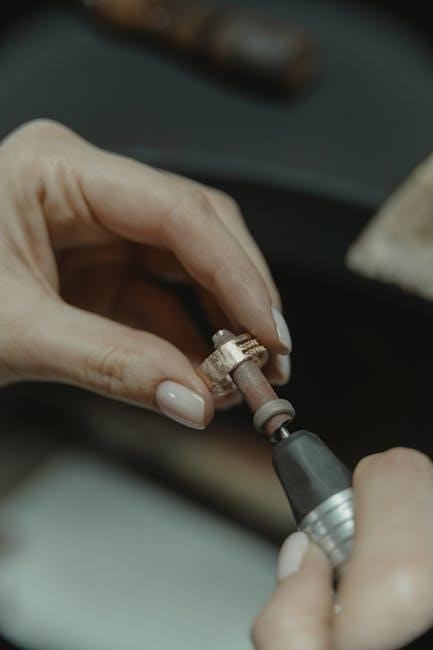
2․3 Buffing the Nail Surface
Buffing the nail surface is essential for creating a smooth base and enhancing adhesion․ Use a nail buffer to gently shape and refine the nail, removing ridges or imperfections․ Start with a coarse grit to shape, then switch to a finer grit for a polished finish․ Lightly buffing ensures the gel polish adheres evenly and lasts longer․ Avoid over-buffing, as it can weaken the nail․ This step is key for a professional-looking result with Nailboo Gel Polish․
Applying the Base Coat
Applying the base coat is crucial for a long-lasting finish․ Use smooth strokes to cover each nail evenly, then cure under LED or UV light for proper adhesion․
3․1 Importance of a Base Coat
The base coat is essential for a long-lasting gel polish application․ It protects the nail from staining, creates a smooth surface, and ensures proper adhesion of the polish․ By applying a base coat, you prevent the gel from lifting or peeling prematurely, enhancing durability․ It also acts as a barrier, safeguarding your nails from potential damage․ A well-applied base coat is the foundation for a professional, salon-quality finish, making it a crucial step in the Nailboo gel polish process․
3․2 How to Apply the Base Coat
Apply a thin, even layer of Nailboo Gel Base Coat to each nail using smooth, steady strokes․ Start at the center and sweep toward the tip, avoiding cuticles․ Ensure full coverage without overloading the brush․ Cure under an LED light for 30 seconds or a UV light for 2 minutes․ This step creates a protective barrier and promotes adhesion for the gel polish, ensuring a long-lasting finish․ Proper application is key for a professional and durable manicure․
3․3 Curing the Base Coat
Cure the base coat under an LED light for 30 seconds or a UV light for 2 minutes․ Ensure the entire nail surface is exposed to the light for even curing․ Keep your hand steady during the process to avoid uneven results․ Proper curing ensures the base coat adheres well and creates a strong foundation for the gel polish․ Allow the base coat to fully cure before proceeding to the color application for a professional and long-lasting finish․ Follow the manufacturer’s guidelines for optimal results․
Applying the Gel Polish Color
Apply thin, even layers of Nailboo Gel Polish, curing each under UV/LED light․ Use smooth strokes for full coverage, avoiding cuticles and excess polish for a professional finish․
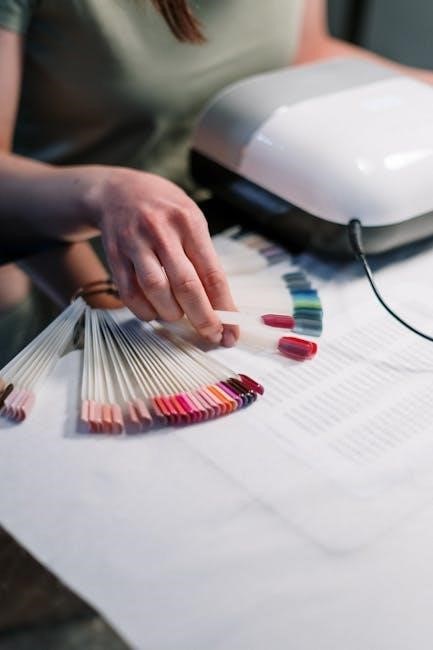
4․1 Choosing the Right Color
Selecting the right color for your Nailboo Gel Polish application is key to achieving your desired look․ With a wide range of vibrant options available, you can choose a shade that matches your personal style, the occasion, or your skin tone․ Consider classic neutrals for a timeless appearance or bold hues for a statement look․ The smooth, silky texture of Nailboo Gel Polish ensures a professional finish, making every color choice a stunning option for long-lasting, salon-quality results at home․
4․2 Applying Thin Layers
Applying thin layers is crucial for a smooth, professional finish with Nailboo Gel Polish․ Dip the brush into the polish, wipe off excess on the bottle neck, and paint in smooth, steady strokes from the center to the tip․ Avoid overloading the brush, as this can lead to uneven application․ Thin layers ensure proper adhesion and prevent pooling near the cuticles․ Cure each layer under the LED or UV light as recommended to promote long-lasting wear and a flawless result․ This technique is essential for achieving salon-quality nails at home․
4․3 Curing Each Layer
Curing each layer of Nailboo Gel Polish is essential for a professional finish․ Use an LED light for 30-60 seconds per layer or a UV light for 2-3 minutes․ Ensure the entire nail surface is exposed to the light to avoid uneven curing․ Proper curing promotes strong adhesion and prevents peeling; Cure the base coat, color, and top coat separately, following the recommended times for your lamp․ This step is crucial for achieving a durable, long-lasting, and high-shine finish at home․
Finishing with a Top Coat
Seal your color with a thin layer of Nailboo Gel Top Coat for a glossy finish․ Cure under LED light for 30 seconds or UV for 2 minutes․
5․1 Applying the Top Coat
Apply a thin, even layer of Nailboo Gel Top Coat to seal your color and add shine․ Use smooth, steady strokes from the center to the tip, avoiding cuticles․ Ensure full coverage without pooling․ Proper application ensures a glossy, chip-resistant finish․ Avoid overloading the brush, as excess polish can lead to uneven drying․ Wipe excess product on the bottle neck for precise control․ This step locks in your color and enhances durability, providing a professional-looking result․
5․2 Curing the Top Coat
Cure the top coat under an LED light for 30 seconds or a UV light for 2-3 minutes․ Ensure the entire nail surface is exposed to the light for even curing․ Keep your hand steady to avoid movement, which can disrupt the finish․ Proper curing ensures a high-shine, chip-resistant result․ Avoid touching the nails until fully cured to prevent smudging․ Follow the manufacturer’s guidelines for optimal results, as proper curing is essential for a durable, professional-looking finish․

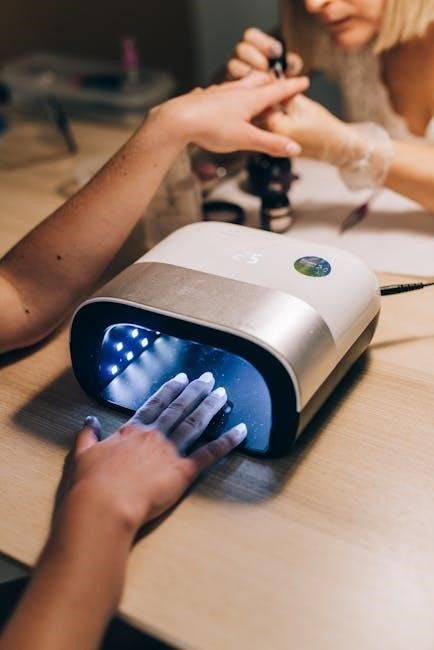
Curing Process
Curing is essential for a durable finish․ Use an LED light (30-60 seconds) or UV light (2-3 minutes) to harden each layer, ensuring even exposure for a professional result․
6․1 Using an LED Light
LED lights offer faster curing times, typically 30-60 seconds per layer․ Place your hand steady under the light, ensuring the entire nail surface is exposed․ This method is energy-efficient and reduces curing time compared to UV lights․ Proper alignment ensures even curing, preventing uneven finishes․ Follow the manufacturer’s guidelines for specific timing to achieve optimal results․ LED lights are ideal for those seeking quick, professional-looking finishes at home․

6․2 Using a UV Light
UV lights require longer curing times, typically 2-3 minutes per layer․ Ensure the entire nail surface is exposed to the light for even curing․ Keep your hand steady to avoid uneven results․ Proper curing under UV light enhances adhesion and durability․ Follow the manufacturer’s recommended times for optimal results․ While slower than LED lights, UV lights are effective for achieving a professional finish․ Proper technique ensures a long-lasting, chip-resistant manicure at home․
6․3 Proper Curing Techniques
Proper curing ensures a strong bond between layers and a glossy finish․ Expose the entire nail surface to the light, keeping your hand steady․ Cure thin layers separately, starting with the base coat, then color, and finally the top coat․ Follow the manufacturer’s guidelines for timing․ Proper curing prevents peeling and chipping, ensuring long-lasting results․ Avoid movement during curing to maintain even hardness․ This step is crucial for achieving a professional, salon-quality finish at home with Nailboo Gel Polish․
Tips for a Flawless Finish
For a flawless finish, avoid overloading the brush, apply thin layers, and cure properly․ Ensure smooth strokes, steady hands, and even coverage for a professional-looking result․
7․1 Avoiding Overloading the Brush
Overloading the brush with excess polish leads to uneven application and pooling near the cuticles․ To avoid this, wipe the brush against the bottle neck to remove excess polish․ This ensures a precise, controlled amount of product is applied․ Using smooth, steady strokes from the center to the tip of the nail promotes even coverage․ Thin layers adhere better and cure properly, preventing peeling and ensuring a long-lasting, professional finish․ Proper brush control is key to achieving a flawless result․
7․2 Ensuring Proper Adhesion
Proper adhesion is crucial for a long-lasting gel polish finish․ Start by cleaning your nails with a lint-free wipe and alcohol to remove oils and residue․ Gently buff the nail surface to create a smooth base, then wipe away dust with alcohol․ This ensures the gel polish adheres evenly and prevents peeling․ Clean, dry nails are essential for a strong bond between the nail and the polish, resulting in a professional-looking, durable finish that lasts up to two weeks․
7․3 Maintaining Thin Layers
Maintaining thin layers is essential for a smooth, professional finish․ Apply gel polish in thin, even strokes, wiping excess from the brush on the bottle neck․ Thick layers can lead to uneven drying, peeling, and extended curing times․ Proper layering ensures better adhesion and prevents pooling near the cuticles․ Cure each layer thoroughly under the UV or LED light to promote even curing and a long-lasting result․ This technique guarantees a glossy, chip-resistant finish that lasts up to two weeks․
Combining Gel Polish with Dip Powder
Combining gel polish with dip powder enhances durability and appearance․ Apply a thin gel base coat, cure, then layer gel polish over dip powder for added strength and shine․
8․1 Layering for Enhanced Durability
Layering gel polish over dip powder creates a vibrant, long-lasting finish․ Start with a cured gel base coat, apply dip powder, and cure under LED light․ Brush a thin layer of gel polish, ensuring even coverage, and cure again․ Repeat for opacity if desired․ Finish with a thin top coat and cure․ This method combines the durability of dip powder with the glossy finish of gel polish, resulting in a salon-quality manicure that lasts up to two weeks․
8․2 Step-by-Step Combination Process
Start by applying a thin gel base coat and curing it under an LED light for 30 seconds․ Next, dip your nail into the dip powder, tapping off excess․ Cure the powder under the LED light for another 30 seconds․ Apply a thin layer of gel polish over the dip powder, ensuring even coverage, and cure for 30 seconds․ Repeat for desired opacity․ Finish with a thin top coat and cure for 30 seconds․ This process combines durability and shine for a long-lasting finish․
Maintaining Long-Lasting Results
Keep nails dry for 24 hours post-application․ Avoid harsh chemicals and water exposure․ Moisturize cuticles regularly․ Use a no-wipe top coat for added protection and shine retention․
9․1 Aftercare Tips
To maintain long-lasting results, keep nails dry for 24 hours post-application․ Avoid exposure to water or harsh chemicals, as this can weaken the gel polish․ Moisturize cuticles regularly to prevent dryness and promote nail health․ Use a no-wipe top coat to seal the color and add an extra layer of protection․ Avoid using nails as tools to prevent chipping․ For optimal durability, avoid extreme temperatures and abrasive activities․ Proper aftercare ensures your Nailboo Gel Polish remains vibrant and chip-free for up to two weeks․
9․2 Avoiding Harsh Chemicals
Exposure to harsh chemicals can weaken the gel polish and damage your nails․ Avoid using strong detergents, cleaning products, or nail polish removers, as they can strip the polish and dry out your nails․ When handling chemicals, wear gloves to protect your hands․ This helps maintain the integrity of the gel polish and keeps your nails healthy․ By avoiding harsh chemicals, you can extend the wear of your Nailboo Gel Polish and preserve its vibrant finish․
9․3 Moisturizing Cuticles
Moisturizing your cuticles is essential for maintaining healthy nails and preventing dryness․ After applying Nailboo Gel Polish, use a cuticle oil or cream to hydrate the skin around your nails․ This helps prevent irritation and promotes a professional finish․ Regular moisturizing supports nail health and ensures your gel polish adheres properly, contributing to a long-lasting, salon-quality result․ Keep your cuticles hydrated to maintain the integrity of your manicure and overall nail well-being․
Common Mistakes to Avoid
Overloading the brush and improper curing are common errors; Uneven application and insufficient curing can lead to peeling and chipping, ruining the finish and durability․
10․1 Improper Curing
Improper curing is a common mistake that can lead to a weak bond between layers, causing peeling or chipping․ Ensure each layer is cured for the recommended time: 30 seconds under an LED light or 2-3 minutes under a UV light․ Inadequate curing can result in a tacky finish or uneven adhesion․ Always follow the manufacturer’s guidelines for curing times to achieve a professional, long-lasting result․ Proper curing is essential for a durable and chip-resistant finish․
10․2 Uneven Application
Uneven application can ruin a manicure․ Overloading the brush with too much polish leads to pooling near cuticles and smudging․ To avoid this, wipe excess polish on the bottle neck and use smooth, steady strokes․ Apply thin, even layers, curing each properly․ Proper brush control and minimal pressure ensure a flawless finish․ Avoid excessive polish to prevent uneven drying and peeling․ Thin layers promote better adhesion and a professional-looking result, ensuring your Nailboo Gel Polish lasts longer and looks salon-quality․
Mastering Nailboo Gel Polish brings salon-quality results home․ With proper prep, thin layers, and curing, achieve durable, glossy nails․ Follow these steps for a flawless manicure every time․
11․1 Summary of Key Points
Proper nail preparation, thin layer application, and correct curing times are essential for long-lasting results․ Avoid overloading the brush and ensure even coverage․ Cure each layer thoroughly under UV or LED light for durability․ Regular moisturizing of cuticles and avoiding harsh chemicals extend wear․ Combining gel polish with dip powder enhances strength and shine․ Follow these steps for a professional, salon-quality finish at home․ Consistent practice and attention to detail will help master the Nailboo Gel Polish application process․
11․2 Final Tips for Success
For a flawless finish, ensure proper nail preparation and thin, even layers․ Cure each layer thoroughly under the recommended light․ Avoid overloading the brush to prevent uneven application․ Moisturize cuticles post-application and avoid harsh chemicals․ Practice makes perfect—mastering Nailboo Gel Polish requires patience and attention to detail․ By following these tips, you’ll achieve salon-quality results that last up to two weeks․ Consistent care and proper technique will elevate your at-home manicure experience․